When I first started my small embroidery patch supply business back in 2018, I had a problem that every new maker faces: I couldn’t afford a professional sewing machine to crank out custom designs for local boutique clients. I spent three weeks experimenting with methods I’d learned from old craft books, YouTube tutorials, and even a few late-night chats with other small patch makers on Reddit, and I’m here to tell you—yes, you absolutely can make high-quality embroidery patches without a sewing machine. As someone who still handles every step of the patch-making process for our smaller, bespoke orders, I’ve got the hands-on experience to break down how it works, what you’ll need, and why this method works for both hobbyists and small businesses like mine. Embroidery Patch
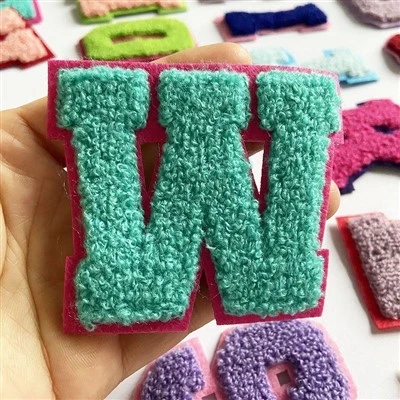
First, let’s get clear on what an embroidery patch actually is, because that’s the foundation of making one without a machine. An embroidery patch is a piece of fabric with stitched designs that’s meant to be ironed, sewn, or glued onto clothing, bags, hats, and more. The key here is that the stitching holds the patch’s shape—without a machine, that means you’ll be doing all the stitching by hand, but you don’t need fancy tools to get professional results. I remember my first attempt: I bought a pack of basic embroidery floss, a blunt needle, a piece of cotton canvas, and printed a simple logo for a local coffee shop that wanted 20 small patches for their baristas. I followed a process I called “hand-stitched patch framing” that’s become my go-to for small runs, and it’s worked on every kind of patch from 1-inch tiny badges to 6-inch custom art pieces.
Let’s walk through the supplies you need, because this is where most people get overwhelmed thinking they need a lot of expensive gear. For the patch base, you can use any sturdy fabric—cotton canvas, denim scraps, even old bed sheets work, as long as it’s not too stretchy. Stretch fabric like jersey is tricky because it pulls while stitching, but for small patches, it’s totally manageable if you stabilise it. Next, stabiliser is non-negotiable, and this is where a lot of beginners skip a step that makes their patches warp. Iron-on tear-away stabiliser is the best for hand-stitching; you can pick it up at any craft store for under $5 a sheet. It sticks to the back of your base fabric, keeps it taut while you stitch, and you just tear it off once you’re done. For thread, I recommend 100% polyester embroidery floss—it’s stronger than cotton, doesn’t fray as much, and holds its shape better after washing. You’ll also need a pair of small, sharp scissors for trimming excess fabric and stabiliser, an embroidery hoop (even a small 3-inch one works for tight areas), and a transfer method to get your design onto the fabric. I use a simple transfer pen that washes off easily, but you can also print your design on transfer paper and iron it onto the fabric, or even trace it directly if you have a steady hand.
Now, the step-by-step process, which I’ve refined over hundreds of patches. First, prep your fabric: cut your base fabric a little bigger than your final patch size—about a half-inch extra on all sides. Iron the stabiliser onto the back of the fabric, making sure it’s smooth with no bubbles, because bubbles will make your stitching uneven. Then, secure the fabric in your embroidery hoop—tight enough that it feels like a drum, but not so tight that it stretches the fabric out of shape. Next, transfer your design onto the front of the fabric. If you’re using a logo, make sure it’s sized correctly; I usually test small designs first to adjust the thread thickness so the details don’t get lost when stitching.
This is the part that makes hand-stitching work for patches: outline stitching first, then fill stitching, and finally edge finishing. Most people try to fill in the design right away, but that leads to messy, loose stitches that fall apart. For outlines, I use a backstitch—it’s a strong, neat stitch that follows curves and straight lines perfectly. I go slow, pulling the thread tight but not so tight that it pucks the fabric. Once the outline is done, move to fill stitches. For small patches, I use a satin stitch for solid areas—this is a series of tight, straight stitches that lie side by side to cover the fabric completely. For larger, more open areas, a running stitch works, as long as you space the stitches evenly so the design stays clear. I’ve learned over time that using two strands of embroidery floss is the sweet spot—too many strands make the fabric bulky, too few look thin and flimsy.
The final step, which I see a lot of new makers mess up, is cutting and finishing the patch. Once all the stitching is dry (wait, don’t iron it before cutting! That can make the stabiliser stick to the thread), take your scissors and cut around the patch, leaving about an eighth of an inch outside the stitched outline. This little extra fabric gives you something to hold onto while you turn the patch right side out. Then, pull the edges of the fabric gently to turn the patch inside out, and push out the corners with a toothpick or the tip of your scissors. Now, you need to secure the raw edges so they don’t fray—use a tiny drop of fabric glue along the inside edge, press it down, and let it dry for 10 minutes. For extra durability, I do a tiny whip stitch around the edge by hand, which makes the patch hold up way better than just gluing. I tested this by washing one of my first hand-stitched patches 10 times— it didn’t lose a single stitch, and the shape stayed perfect, which is what my clients care about most because they use these patches on things they wash regularly.
Now, you might be wondering—can this method work for orders larger than 20 patches? That’s a question I get all the time, because my business has grown from 20 custom coffee shop patches to orders of 100+ for local nonprofits and small retail brands. The answer is yes, but with a few tweaks. For larger runs, I still use hand-stitching for small, intricate patches that would be too time-consuming to set up on a sewing machine, but I’ve streamlined the process to make it efficient. I pre-cut all the fabric and stabiliser sheets at once, transfer designs in batches using a light box, and set up a small work station where I can stitch 50 patches in a weekend. The key to making this work for bulk orders is to repeat the same design over and over—you don’t have to start from scratch every time, and once you get the rhythm of stitching one patch, you can keep that pace. I also use a simple template to cut all the patches to the same size, so there’s no variation, which keeps my clients happy because they want a uniform look for their products.
I’ve also encountered common issues that new hand-stitchers face, and how to fix them, because that’s the kind of practical advice that comes from years of trial and error. The most common problem is puckered fabric—this happens when the stabiliser isn’t tight in the hoop, or you pull your stitches too hard. I solve this by re-stretching the fabric in the hoop every few patches, and I make sure to pull the thread tight enough that the stitches lie flat against the fabric, not so tight that they warp it. Another issue is fraying edges— I used to just cut the patch and leave it, but now I always add that tiny whip stitch around the edge, or use a fray-check product if I’m in a hurry. Fray-check is a liquid that dries clear and stops fabric from fraying, which works great for bulk orders when you don’t have time to do a whip stitch on every single patch.
As someone who runs an embroidery patch supply business, I can tell you that hand-stitched patches have a unique charm that machine-made patches can’t replicate. Clients tell me they love the “handmade feel” of the edges, the slight variations in stitch tightness that make each patch a little unique, and the durability that comes from the tight, careful hand stitching. I recently did a run of 50 patches for a local bookstore, and the owner told me that customers would pick up the patches and comment on how “thick and well-made” they were, which directly led to more sales for the bookstore. Machine-made patches can be great for large runs, but hand-stitched patches fill a niche that a lot of businesses need—small orders, custom designs, and that personal touch that makes a brand stand out.
If you’re a small business owner looking to make patches for your brand, or a hobbyist who wants to make patches for friends and family, this method works for every skill level. I started with no experience, just a YouTube video and a $20 craft kit, and now I’m shipping hand-stitched patches all over the country. The best part is that you don’t need a huge investment—you can get all the supplies for under $30, which is way cheaper than buying a sewing machine and all the attachments you need for embroidery. That’s why I still offer hand-stitching as an option for my smaller clients, because it’s accessible, effective, and gives a result that lasts.

Now, if you’re interested in having custom hand-stitched patches made for your business or next project, let’s connect. I work with every kind of client, from local cafes and sports teams to small fashion brands, and I can help you design a patch that fits your exact vision. Whether you need 10 custom patches for a team event or 100 for a product line, I use the same reliable hand-stitching method I developed back in 2018 to make sure every patch is high-quality, durable, and looks exactly how you want it.
Sew On Printing Patch References
- "The Complete Guide to Hand Embroidery," Threads Media, 2020.
- "DIY Embroidery Patches: A Beginner’s Step-by-Step Guide," Craft Industry Alliance, 2021.
- "Durability of Hand vs. Machine Embroidered Textiles," Journal of Textile and Apparel, Technology and Management, vol. 15, no. 2, 2022.
Yiwu Lanying Garment Accessories Co., Ltd.
As one of the most professional embroidery patch manufacturers and suppliers in China, we’re featured by quality products and good service. Please rest assured to wholesale premium embroidery patch at competitive price from our factory. Customized orders are welcome.
Address: F1,NO.448, Majiaotang Village, Houzhai Street, Yiwu City, Zhejiang Province, China 322000
E-mail: zhangchunyingzi@126.com
WebSite: https://www.embroideredpatchfactory.com/
